In this post we’re going to really show off the coolest (imho) use-case of Apache Mahout – roll your own distributed algorithms.
All of these posts are meant for you to follow-along at home, and it is entirely possible, you don’t have access to a large YARN cluster. That’s OK. Short story- they’re free on IBM’s BlueMix, where you can:
1. Sign up for a free 30-day account
2. Setup a 5-Node BigInsights (IBMs Hadoop Distro) on Cloud
3. Install Apache Zeppelin and Apache Mahout
4. Run an absurdly large OLS algorithm
The benefit of using a Hadoop as a Service environment is that for analytics, our dataset might not be HUGE enough that uploading is prohibitive, but big enough that we need more horse power than a single node can provide. Being able to spool up a cluster, upload a few files, do some work on it with 5 nodes/240GB RAM/ 48 Virtual processors- and then throw the environment away has a lot of use cases.
In this post we’re doing to write an Ordinary Least Squares algorithm, and then run it on a dataset of 100 million observations by 100 columns (dense).
This is a simplest of algorithms to get you started. Once you have this power at your finger tips, implement any algorithm you find specified in matrix form (which is most of them in academic papers) in Spark or Flink with ease. No longer are you tied to what ever the powers that be running SparkML and FlinkML decide to implement!
Disclosure: I’m working for IBM now, this isn’t an unsolicited sales pitch. The notebook available for part 4 will be available and will run on any Zeppelin instance (assuming you’ve followed the directions for setting up Mahout on Apache Spark listed in a previous post). If you are running Zeppelin locally, you also won’t be able to go as big as we do.
Step 1. Sign up for BlueMix-
Step 2. Setup a 5-Node BigInsights on Cloud
In short IBM Big Insights on Cloud is Hadoop-as-a-Service. It’s also fairly simple to setup.
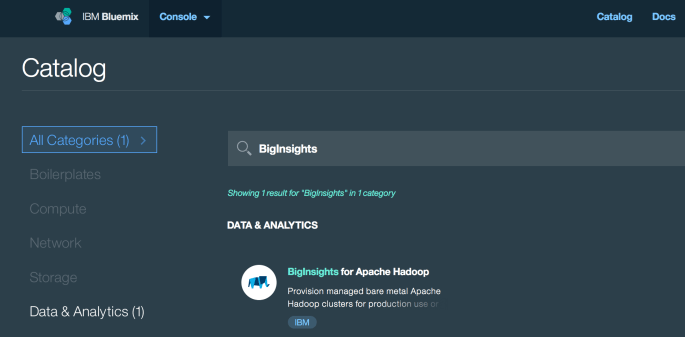
Log in to BlueMix. In the navigation bar you should see “Catalog”. Click that, and then search “BigInsights”.
There are a few different UIs floating around at the moment, if you can’t find a way to create BigInsights, this link might help (must be logged in). Link
Click on BigInsights. In the next window, there should be a button that says ‘Create’ somewhere towards the right or bottom-right. (Old vs. new UI). From this point on, everything should look the same, so I’ll post more screen shots.
On the next screen click “Open”, and on the screen following that click “New Cluster”.
You should now be at a screen that looks like this:
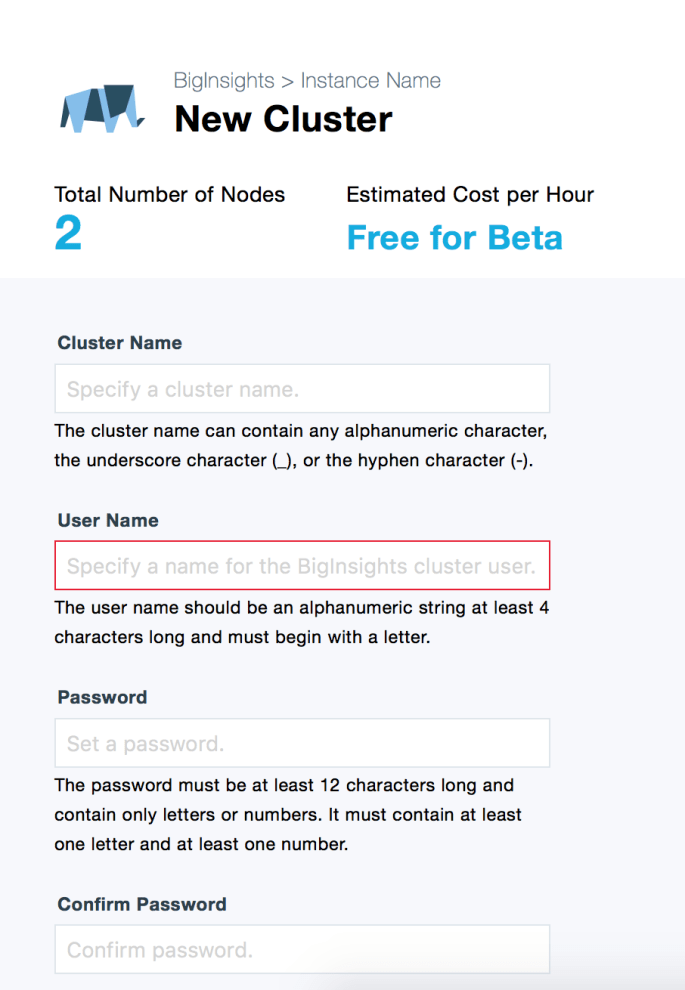
The cluster name/ username / password don’t really matter.
In the following section, make sure to set the following:
- Number of Data Nodes: 5 (current max for free users)
- IBM Open Platform Version:
IOP 4.2(4.3 has Spark 2.0- gross). - Optional Components: Make sure
Sparkis checked.
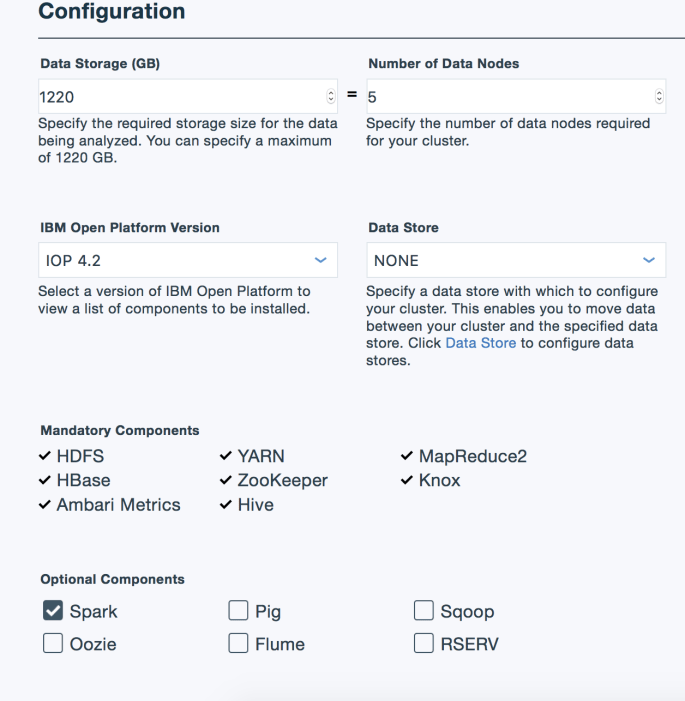
Click “Create” and then go grab some coffee or whatever. It will take about 5-10 minutes to setup.
After you click create you’ll be taken to a screen talking about your cluster.
In the top center you will see SSH Host and a value below that looks something like bi-hadoop-prod-XXXX.bi.services.us-south.bluemix.net, where the XXXX will be four numbers. You will need this value for the next step.
Step 3. Install Apache Zeppelin and Apache Mahout
As a proud new IBM employee, I get unfettered access to these little clusters, to celebrate I’ve done a little Python witchcraft for quickly installing and my favorite services into BigInsights Cloud instances. These scripts also open up some ports in the firewall as needed for WebUIs (especially on Zeppelin, Apache NiFi, and Apache Flink).
The scripts in essence do the following:
– ssh in to the cluster
– download the binaries of the desired program (Zeppelin, NiFi, Flink, etc.)
– untar the program
– Upload some config files specific to BigInsights
– Start the service
– If a WebUI is necessary, a BlueMix app will be created which establishes an ssh tunnel between the world wide web and the port of the service (e.g. 8080 for Zeppelin).
Skip to the end of this section to see what I mean regarding the BlueMix app.
rawkintrevo’s scripts for installing extra services on BigInsights Cloud on github
The following assumes you are running on some sort of Ubuntu. The principals are the same, but you might need to take different steps to make this work on CentOS or OSX.
Obviously you need Python.
You also need the Python modules paramiko and scp, which are used for using ssh with Python. To install these in Ubunbu, from the command line run:
– sudo apt-get install python-paramiko
– sudo apt-get install python-scp
Next you will need to install Cloud Foundry and IBM’s Cloud Foundry bonus packs.
On Ubuntu, it’s going to look something like this-
Download Cloud Foundry Installer All Installers:
wget https://cli.run.pivotal.io/stable?release=debian64&version=6.22.1&source=github-rel
Unpack and install Cloud Foundry:
sudo dpkg -i ./cf-cli-*.deb && apt-get install -f
Set BlueMix Plugin Registry Endpoint:
cf add-plugin-repo bluemix-cf-staging https://plugins.ng.bluemix.net
Install BlueMix Plugins:
cf install-plugin active-deploy -r bluemix-cf-staging
cf install-plugin bluemix-admin -r bluemix-cf-staging
Login to BlueMix via CloudFoundry:
cf login -a https://api.ng.bluemix.net
Now, clone my BlueMix extra services repo:
git clone https://github.com/rawkintrevo/bluemix-extra-services
In ./bluemix-extra-services you’ll find a script example_zeppelin_mahout.py. Open it up and set the following variables:
– APP_PREFIX : Whatever you set this to, Zeppelin will become available at http://APP_PREFIX-zeppelin.mybluemix.net
– SERVER : The name of the SSH Host from the end of Step 2. (not the name you assigned but the ssh address!)
– USERNAME : Username you entered when you created the server
– PASSWORD : Password you entered when you created the server
Note on S3 notebook repositories
You’ll see some commented out section about S3 notebooks. BigInsights free clusters only persist for 14 days. When they expire- so do all of your notebooks, if not persisted. You can use AWS S3 to persist notebooks so they always pop up when create a new cluster. If you have an AWS account, you can create a bucket, and set S3_BUCKET to that value. In that bucket create a folder, set S3_USERNAME to whatever that folder is called. In that folder, create a folder called notebook. There is a link also commented out that explains this further. A little ways down you will see a line commented out z.setS3auth(S3_USERNAME, S3_BUCKET). Uncomment that line to have the script update the config files to use your S3 bucket at a notebook repository.
Finally, in S3. Click on your name at the top right, there will be a drop down. Click on “Security and Credentials”. A window will pop up, click “Continue …”. In the page in the center, click on “Access Keys (Access Key ID and Secret Access Key)”. Click on the blue button that says, “Create New Access Key”. Click on “Download key file”. Save the file as /path/to/bluemix-extra-services/data/resources/aws/rootkey.csv.
These steps are required. That makes this demo a bit more tedious, but in general is good, because then all your Zeppelin notebooks follow you where ever you go. (In the future I’ll probably update so this isn’t required, I’ll update the post then.)
NOTE on S3 charges Using S3 will incur a cost… My notebooks cost me about 14 cents per month.
The important thing to do before running this script is to make sure your cluster is fully set up. To do this, in the browser tab where you created your cluster, click the little back arrow to get to the Cluster list. You will have one cluster listed, named what ever you named it. It should have a little green circle and say “Active”. If it is a yellow circle and says “Pending”, wait a little longer or hit the refresh button at the top of the list. If it is a red circle and says “Failed” has happened to me about one time in 100, hover over the little gear to the right, click “Delete Cluster”, then create a new one again. If that happens be advised your SSH Host will have changed.
Once the cluster is active and you have updated and saved the Python script, run it- it will give you some standard out that should end in
webapp should be available soon at `http://APP_PREFIX-zeppelin.mybluemix.net
where APP_PREFIX is whatever you described it as.
This script is downloading various packages, uploading config files, and finally starting a simple python web app that establishes an SSH tunnel from the webapp to the webUI of the service on the BigInsights cloud cluster.
More information on Bluemix Apps
Step 4. Run an absurdly large OLS algorithm
So you’ve made it this far, eh? Well done. Crack a beer- the rest is pretty easy. Apache Mahout is a library that allows you to quickly ‘roll your own’ algorithms based on matrix representations, and run them on your favorite distributed engine (assuming that engine is either Apache Spark, Apache Flink, or H20).
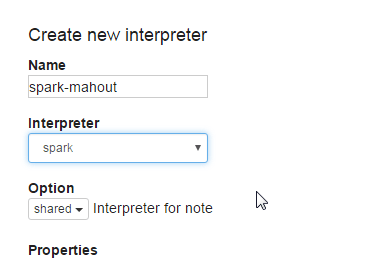
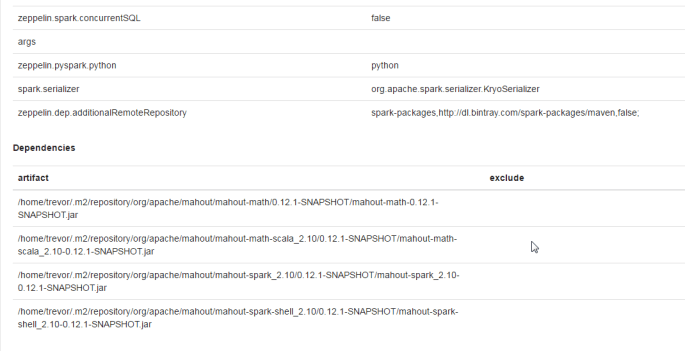
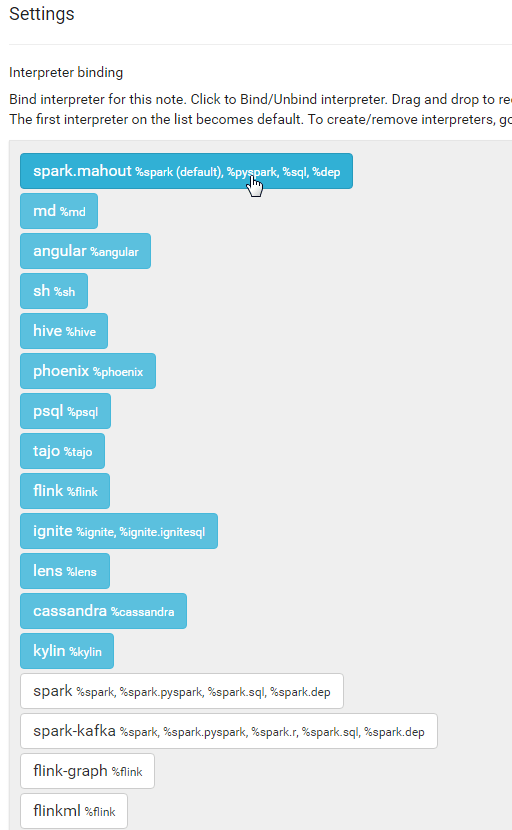
Now- we’re assuming you followed Step 3. to create a YARN cluster, and as such you have a Spark interpreter with all of the appropriate Mahout dependencies and settings. If you didn’t follow step 3, that’s ok- just make sure to create the Mahout interpreter following the steps found in this previous post.
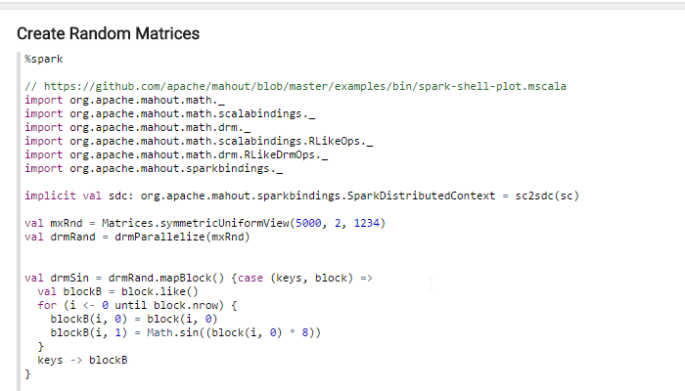
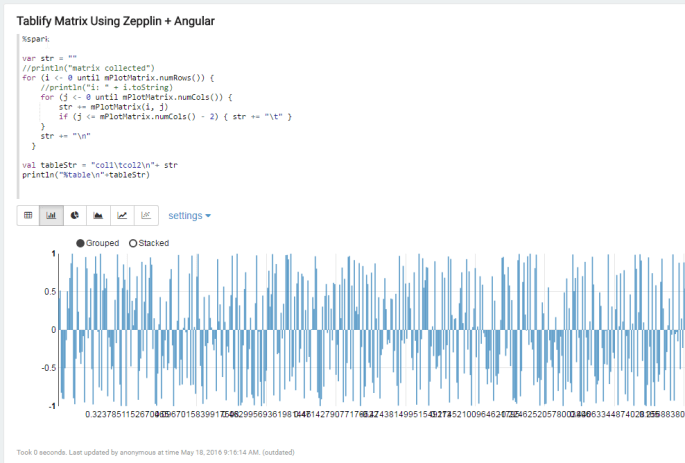
The first paragraph you need to run when using the Mahout interpreter in Zeppelin imports Mahout and sets the distributed context.
Initial Mahout Imports
%sparkMahout

import org.apache.mahout.math._
import org.apache.mahout.math.scalabindings._
import org.apache.mahout.math.drm._
import org.apache.mahout.math.scalabindings.RLikeOps._
import org.apache.mahout.math.drm.RLikeDrmOps._
import org.apache.mahout.sparkbindings._

implicit val sdc: org.apache.mahout.sparkbindings.SparkDistributedContext = sc2sdc(sc)
The example we are going to do today very closely follows the Playing With the Mahout Shell post from the Mahout website, except with a twist. In our version we are going to use import org.apache.spark.mllib.util.LinearDataGenerator to create a very large data set to crunch.
Synthesize some Linear Data
%sparkMahout

import org.apache.spark.mllib.util.LinearDataGenerator
val n = 100000000
val features = 100
val eps = 0.1 // i'm guessing error term, poorly documented
val partitions = 5500
val intercept = 10.0

val synDataRDD = LinearDataGenerator.generateLinearRDD(sc, n, features, eps, partitions, intercept)
Now we have a very large dataset, we need to convert it into a Mahout Distribute Row Matrix (think the Mahout equivelent of a RDD). A good primer on Mahout can be found here.
Create DRM from RDD
%sparkMahout
val tempRDD = synDataRDD.zipWithIndex.map( lv => {
val K = lv._2.toInt
val x = new DenseVector(lv._1.features.toArray )
//x = sparkVec2mahoutVec( lv._1.features ) // still doesn't serialize
val y = lv._1.label
(K, (y, x))
}).persist

println("----------- Creating DRMs --------------")
// temp RDD to X an y
val drmRddX:DrmRdd[Int] = tempRDD.map(o => (o._1, o._2._2))
val drmX = drmWrap(rdd= drmRddX)
val drmRddY:DrmRdd[Int] = tempRDD.map(o => (o._1, new DenseVector( Array(o._2._1) )))
val drmy = drmWrap(rdd= drmRddY)
Also note, the only reason we are using Spark instead of Flink here, is that SparkML comes with this nice linear data generator. Assuming you were loading your data from some other source, the following will code will run on Mahout on Spark OR Mahout on Flink.
For those a little rusty on Ordinary Least Squares method of regression:
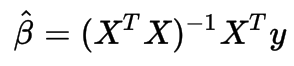
Mahout OLS
%sparkMahout

val drmXtX = drmX.t %*% drmX
val drmXty = drmX.t %*% drmy
val beta = solve(drmXtX, drmXty)
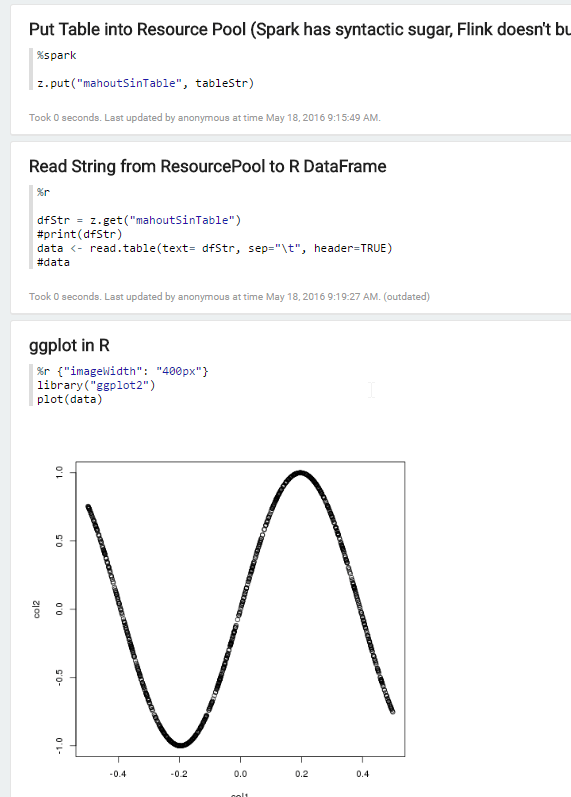
And that’s it. An R-Like DSL for Scala that runs inside your Spark code and can be copy-pasted to Flink code.
Play with the paragraph that synthesizes data. This is a good exercise on how Spark partitioning strategies can affect performance. I played with it for an hour or so- 100 million rows by 100 columns was the largest I could get to run on the BigInsights Cloud ( which has approx 240GB RAM and 48 processors ).
In this post we spent a lot of time setting up an environment and not much time doing anything with it. The onus is now on you to go implement algorithms. In posts that follow, I intend to refer back to this post for setting up an environment that has the horse power to calculate big jobs. Because if you’re not going to be distributed then you have to ask your self, why not just do this in R?
tg
When things go wrong.
Two types of errors can happen in general:
– Zeppelin failed to start correctly
– The webapp failed to start
If you go to the address given and see a 404 error (make sure you typed it correctly), odds are the webapp failed. From the dashboard in BlueMix you should see your webapp, click on it and then click on logs. See if there are any clues.
If you go to the address and see a 502 error, Zeppelin didn’t start. Check the standard out from when you ran the program and look for errors.
If you go to the address and see a 503 error, the web app is tunneling correctly, but Zeppelin isn’t serving it data.
In a terminal ssh in to the cluster as follows:
ssh username@ssh-host
where username is the user name you picked in step 2, and ssh-host is the host given in SSH Host.
If you had a 502 error, from here you can manually start Zeppelin with
z*/bin/zeppelin-daemon.sh start
Then try the website again.
The BigInsights cluster is restrictive to say the least. Use tail to see the end of the logs.
tail z*/logs/*out -n 50
Look for something about AWS credentials not being accepted. If that happens, STOP ZEPPELIN
z*/bin/zeppelin-daemon.sh stop
Delete the zeppelin directory
rm -rf zeppelin-0.7.0-SNAPSHOT
Double check the rootkey.csv (maybe re download?) and run the python script again.
If you don’t see anything, at this point it is just standard Zeppelin troubleshooting.